Table of Contents
- Activating IAP with OSLogin (best option)
- Activating IAP for Project Owners
- Activating IAP for Admins
- Activating IAP without OSLogin
Introduction
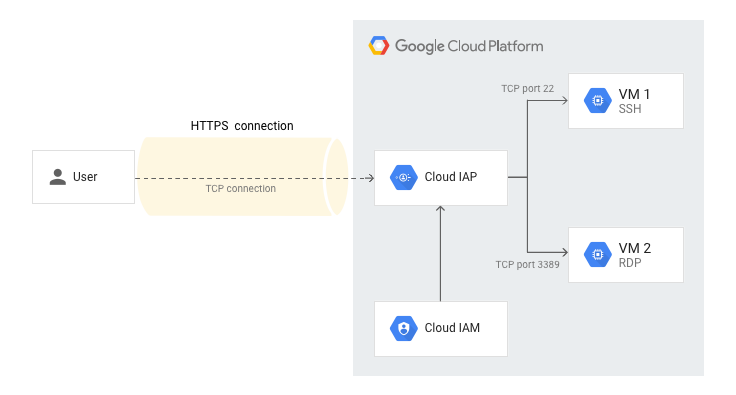
IAP Tunneling is extremely useful for acessing resources that don’t have public IPs.
In fact, it’s much safer and easier than assigning public IPs and configuring Firewall rules, or setting up VPNs inside your projects.
The only thing I dislike is that everytime i have to configure it for a new project, the information needed to do so is spread on around 3 different GCP documentation pages, and they’re a little confusing. The integration with OSLogin is also not very clear.
The best (safest, with more granular permisions) case is presented first – that’s using IAP and OSLogin together.
OSLogin is basically a replacement for the traditional keypair-based authentication technique. It’s extremely easy to use, simpler to manage and can offer many security advantages – mainly integration with other GCP IAM resources such as BeyondCorp Enterprise.

Afterwards, there are also two “corner-cases” presented where IAP seems to work even if not configured at all – one for project Owners and another one for a bundle of admin permissions.
Finally, we’ll talk about using IAP without OSLogin – it’s not the best option, but it’s better than setting everyone as admins/owners, and i’ve uncovered some stuff that the documentation fails to mention.
I hope this will make setting up and using IAP easier for you!
Testing Environment – With OSLogin
For our lab, I created a new project with OSLogin enabled:
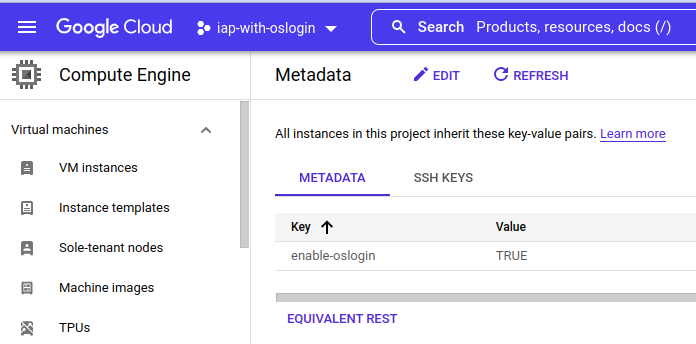
You can check out how to enable OSLogin here, but all you have to do is go to this page and create a key named enable-oslogin with the value set to TRUE.
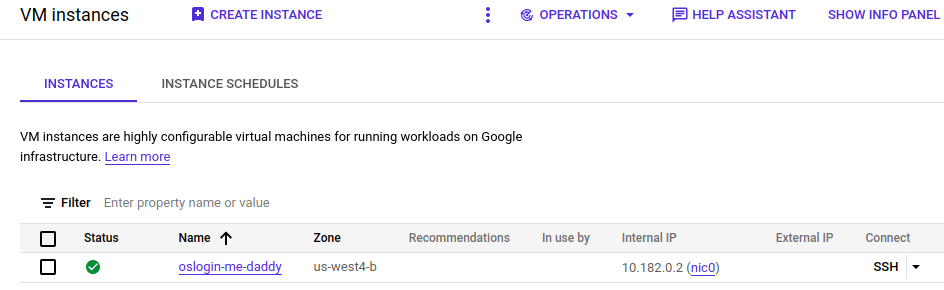
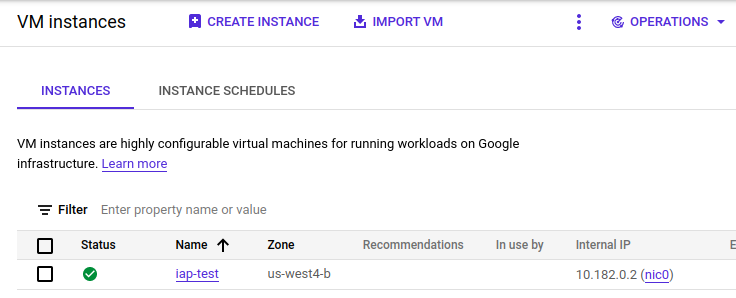
Afterwards, I created a single VM instance without an external IP address:
Activating and Configuring SSH via IAP
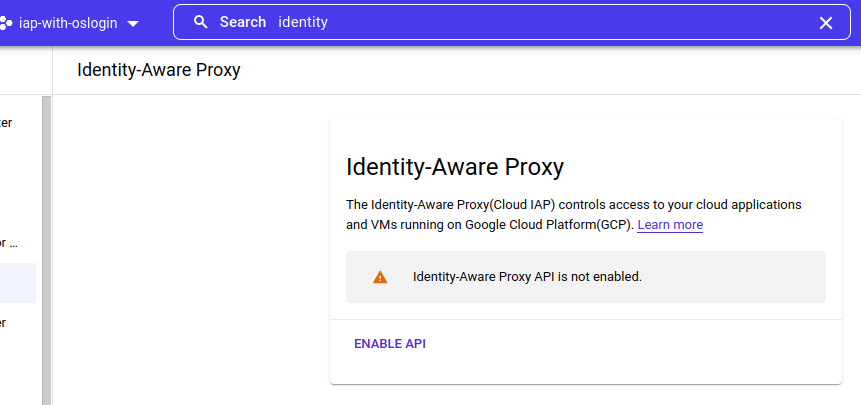
1 – Activate the IAP API:
Go to this page and click on “Enable API”. This will activate IAP on your project.
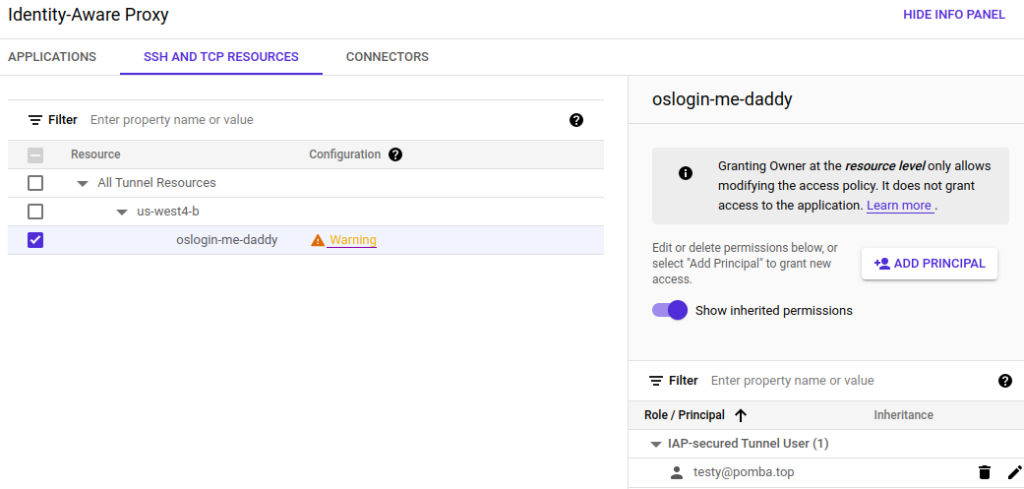
2 – Grant users the “IAP-Secured Tunnel User” role:
For a specific user, grant them the “IAP-Secured Tunnel User” role for each instance they need to access at the resource level on this page.
This role basically allows the user to reach the instance – but it doesn’t allow them to log in or anything else!
You can also set it at the project level, but this will enable them to access ALL instances.
3 – Grant users the “Compute Viewer” role:
This role seems to be required for gcloud to get some basic info about the instance. There may be a more strict role available, but I haven’t tested it that much.
You should set it at the project level.

4 – Grant users the “Compute OSLogin” role
For each instance the user needs to access, grant them the “Compute OS Login” role (for normal access) OR the “Compute OS Admin Login” role (for admin/root access) at the resource level:
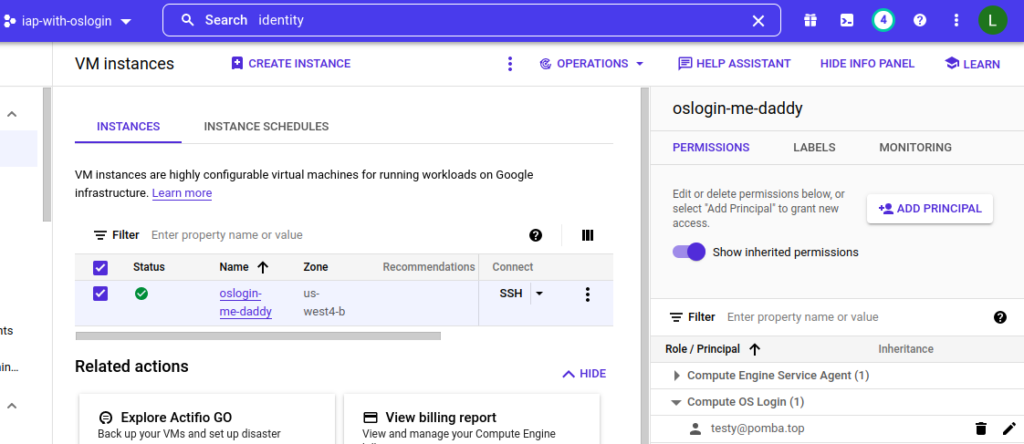
You can also set it at the project level, but this will enable them to access ALL instances.
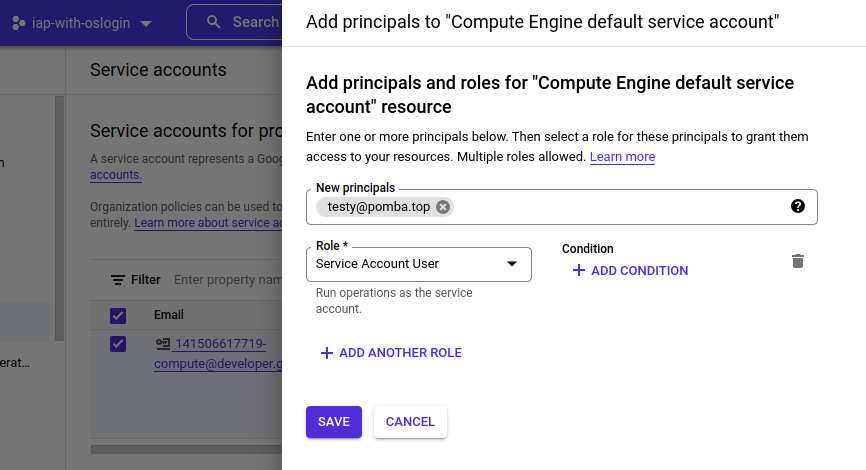
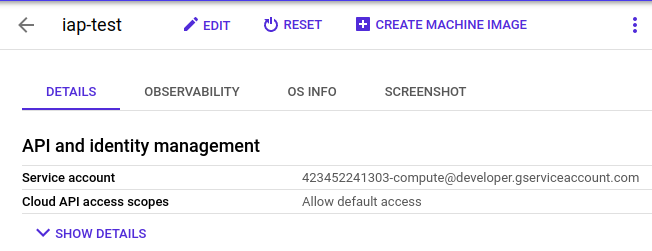
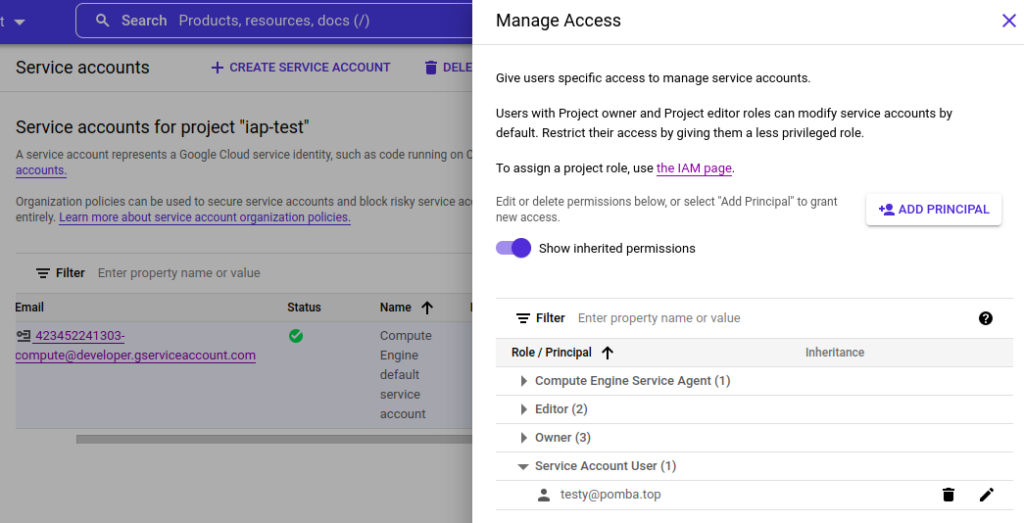
5 – Grant users the “Service Account User” for the Instance’s SA:
Each instance has a Service Account associated with them:
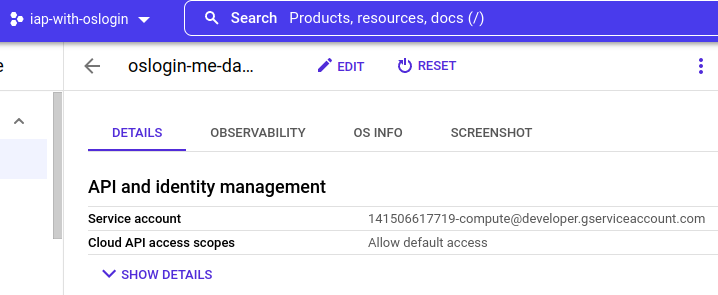
The user logging into the instance needs to be a “Service Account User” for that account. You can add them directly to the SA here.
6 – (May not be required) Create a Firewall rule allowing IAP traffic
If you’re using the default VPC, this step is not required, as the default “allow SSH rule” already does this.
Otherwise, as stated here, you need to allow the IP addresses used by IAP to reach your instances. Create a firewall rule like the one presented below.
For added security, you should only enable the ports you’re going to use:
- 22 for SSH (Linux instances) and/or
- 3389 for RDP (Windows instances)

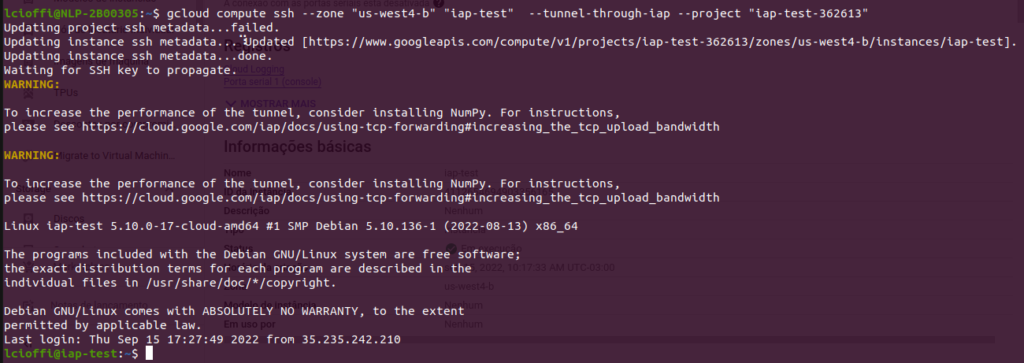
8 – Test the access
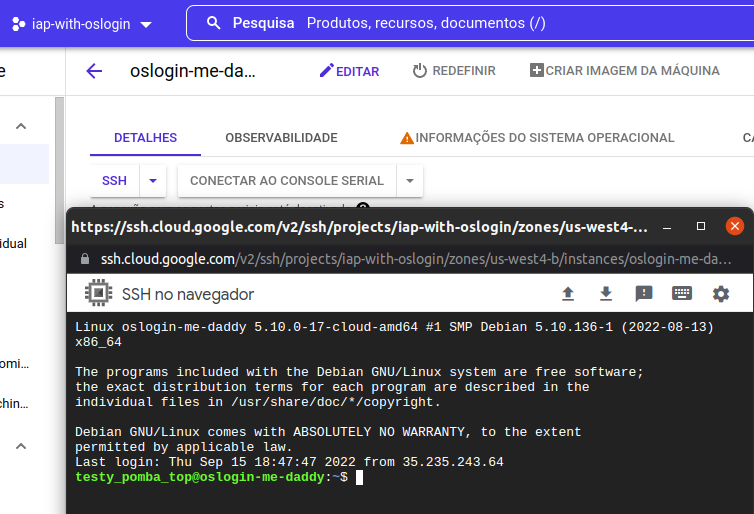
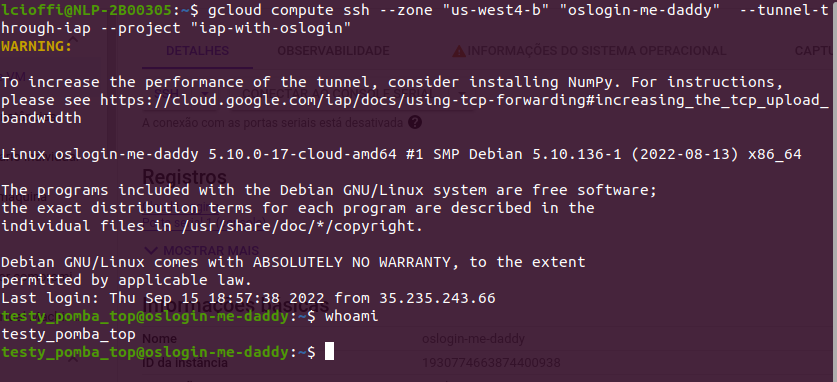
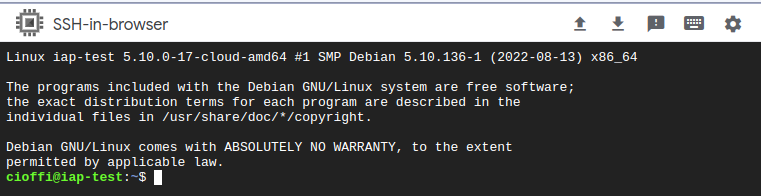
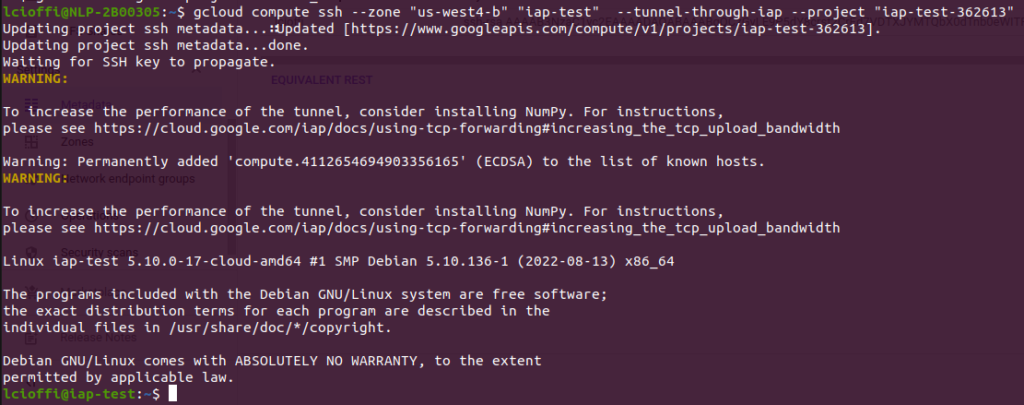
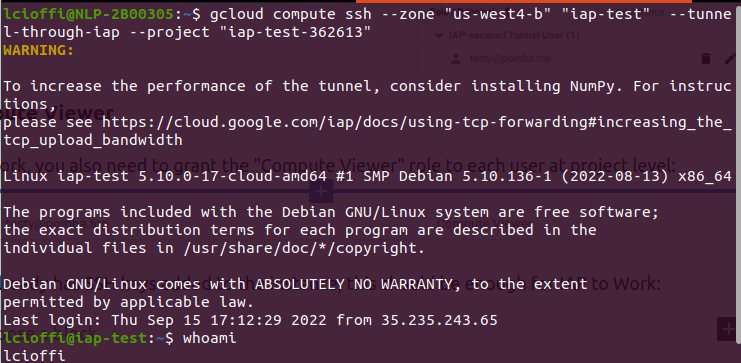
This should be all. Try connecting to your instance using the browser console or the gcloud command:
That’s it! Now, the things below this line are corner cases and unsafer options. They may still be useful to someone, but if you’re just trying to setup IAP for a new project, you’re done. Go! Enjoy!

Testing Environment – No OSLogin
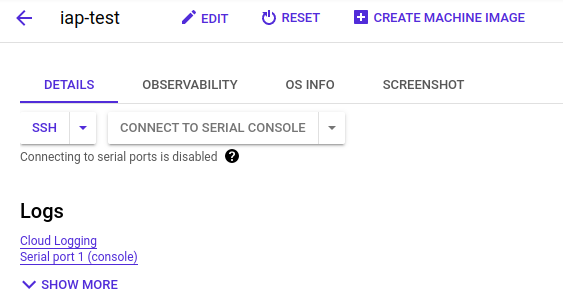
For our environment, I created a new project and a single VM with no External IP address in the default VPC network:
OSLogin was not activated.
1º Corner-Case: Owners
For some reason, users with Owner access to the project can SSH into the instance immediately through the browser:
The machine is also acessible using Gcloud commands:
It’s not clear how this access method works, since no other required steps have been taken (such as activating the IAP API, creating the tunnel, etc.).
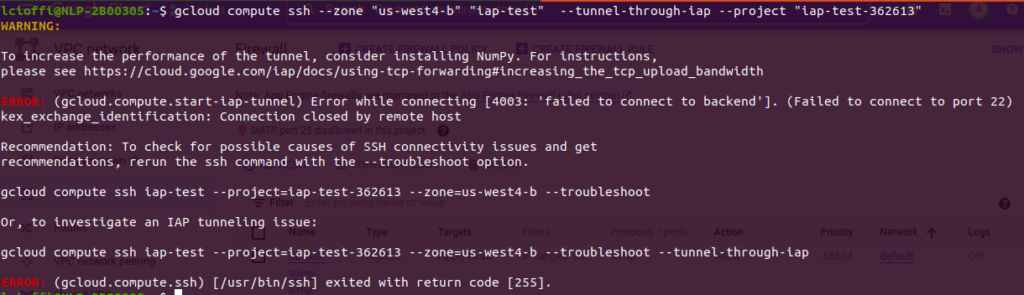
If you’re not using the default VPC (or if you deleted the default “allow from anywhere” firewall rule for SSH), the connection fails:
Creating an allow rule specifically for IAP’s source IPs fixes the issue:
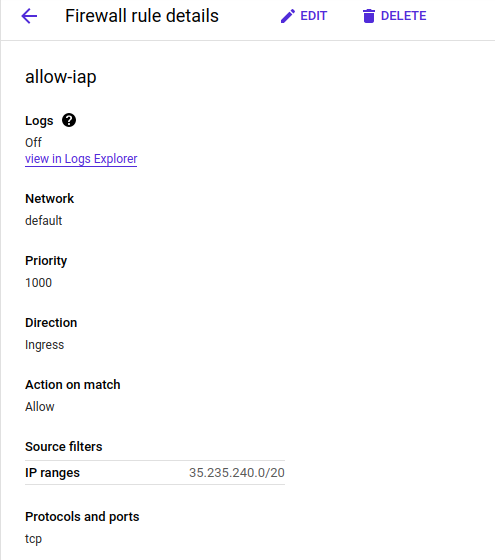
In short, if you’re the project Owner, all you need to have is:
- A Firewall rule allowing 35.235.240.0/20 for SSH access (TCP port 22)
It seems that GCP automatically takes care of the rest.
2º Corner-Case: Admins
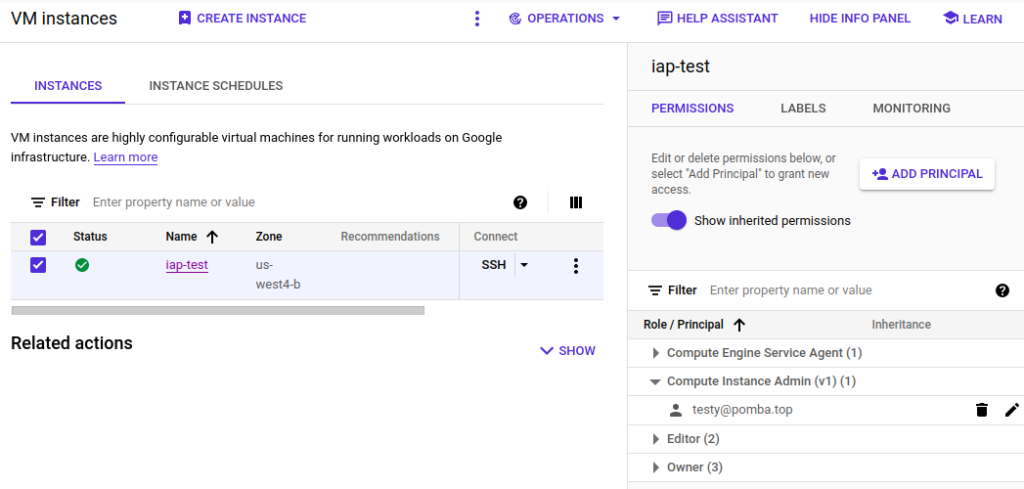
Users with THESE permissions:

Are also able to SSH into instances, even with IAP disabled. Again, it seems that GCP does some tricks behind closed curtains for the connections to work.
These are some very permissive roles, so I don’t recommend using this method.
This configuration will give them access to ALL the instances in the project. If you want them to only access certain instances, you should:
- Give them the “Compute OS Admin Login” or “Compute OS Login” at the instance level for each instance you want them to access
- Give them the “Service Account User” role for the SA used by each of the instances you allowed in the previous step (if you didn’t change anything, that would be only the Compute Engine Default Service Account)
OBS: For this case, the “Editor” role is not enough!
In short, if you want a project Admin to access instances with no public IP, all you need to do is:
- A Firewall rule allowing 35.235.240.0/20 for SSH access (TCP port 22)
- Give them the permissions listed above
3º – SSH via IAP Without OSLogin
This method assumes you’re not using OSLogin, which is a downside – your users are using SSH keys, which are not directly tied to their Google accounts. Still, it’s miles better than the two corner cases presented above.
1 – Activate the IAP API:
You can activate IAP through this link.
If you’ve accessed the instance using one of the corner cases listed above, it’s possible the API may have been activated automatically.
2 – Add a Firewall rule allowing IAP connections
As stated here, you need to allow the IP addresses used by IAP to reach your instances.
This can be done by creating a firewall rule that allows the 35.235.240.0/20 range to reach your instances (all of them or only the ones you want).
For added security, you should only enable the ports you’re going to use:
- 22 for SSH (Linux instances) and/or
- 3389 for RDP (Windows instances)
3 – Grant necessary permissions to users
Now, for each instance, you’ll need to grant the following permissions:
OBS: You can also set these privileges at the project level to grant a user access to ALL instances in the project. But you wouldn’t do that, would you?
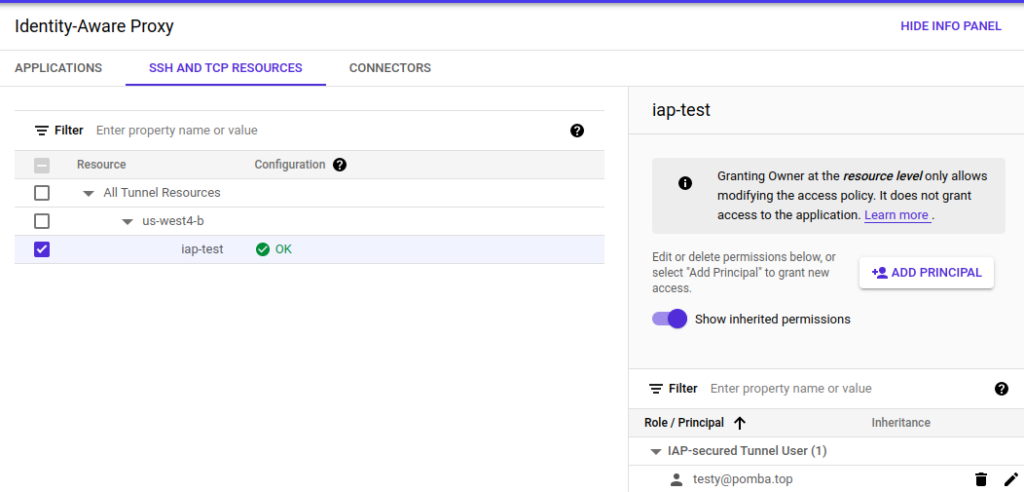
3.1 – IAP-Secured Tunnel User
You need to grant the “IAP-Secured Tunnel User” role for the instance’s IAP tunnel to each user that needs to SSH into the instance.
You can do this here
3.2 – Compute Viewer
For IAP to work, you also need to grant the “Compute Viewer” role to each user at project level:

If the user already has SSH keys added to the instance, this should be enough for IAP to Work:
If there are no SSH keys added, then continue reading.
3.3 – Add SSH keys to instance
You can do this two ways:
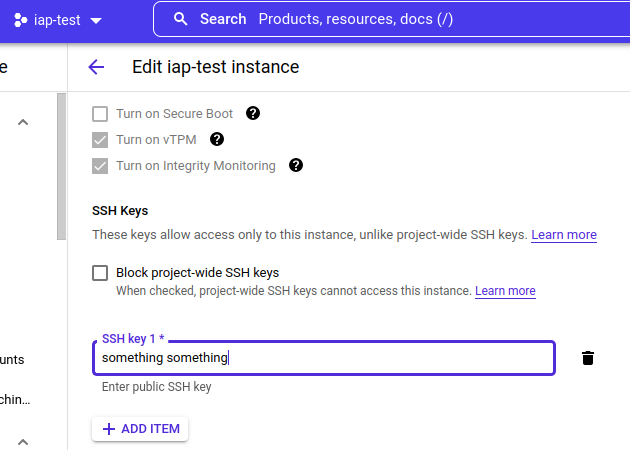
Manually – by editing your VM and manually adding the user’s public key to the VM’s keys list:
Read the full instructions here if you have any doubts.
3.4 – Service Account User
Finally, the user needs to be a “Service Account User” for the SA the instance uses:
Finally, it works!
Views: 454